How to Remove the WooCommerce Sorting Dropdown
WooCommerce themes like to place a strong emphasis on navigation and ease of use for users. Making your site as easy to search and browse as possible is an important way to ensure sales.
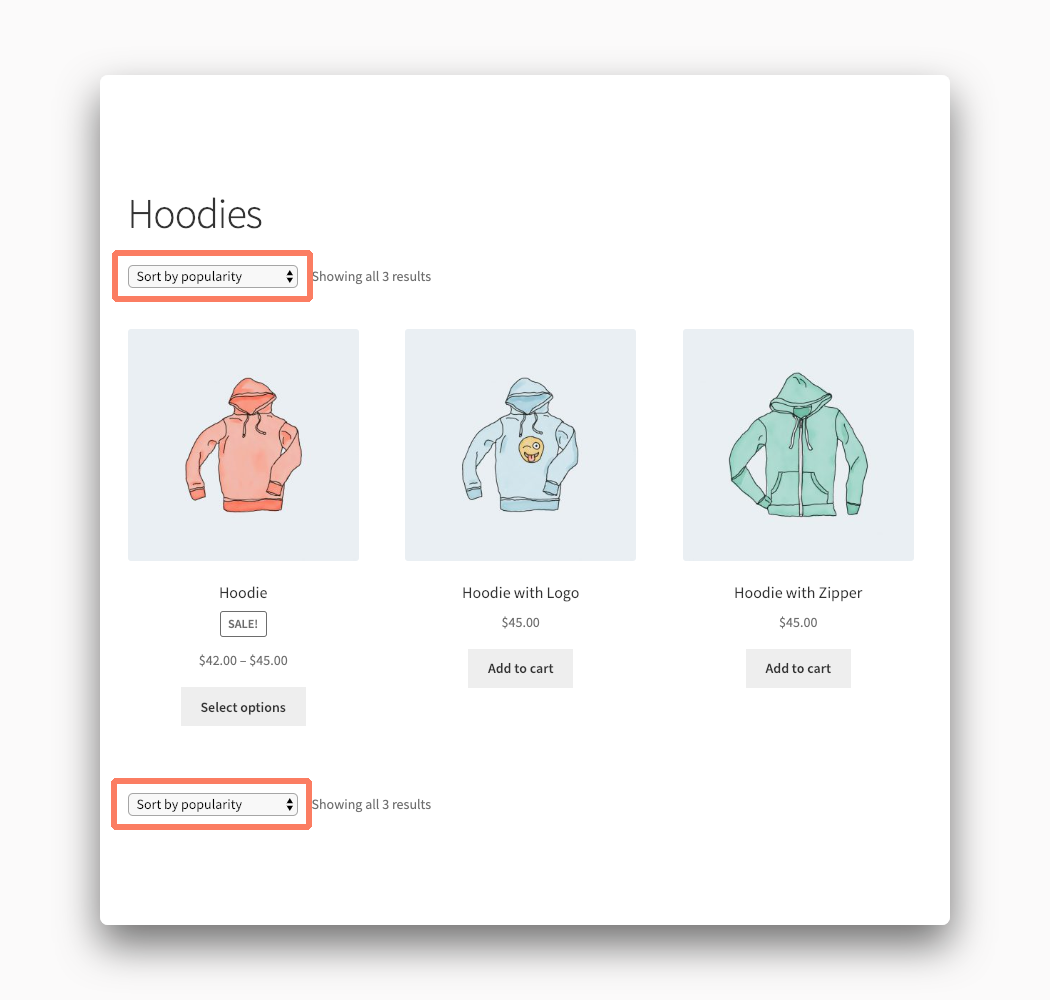
One of the default ways in which WooCommerce improves browsing your store is through a simple sorting dropdown on category and search result pages. This dropdown lets your customers rearrange the products they are seeing through a handful of default methods:
- Relevance (in cases of a search)
- Popularity
- Average Rating
- Latest
- Price, Lowest to Highest
- Price, Highest to Lowest
These are great ways to sort a big list of products in a multitude of common ways. Of course, if your store doesn’t have a lot of products it can be kind of silly and useless to clutter your site with a sorting dropdown like this.
Who needs to be able to sort categories of two products, for example?
You can remove the sorting dropdown from your store with modifications to the code in your theme files. We’ll walk you through the steps the rest of the way in this post.
How to Hide the WooCommerce Sorting Dropdown with Code
You’re going to need to add a few lines of code to your store to get rid of these sorting dropdowns. There is a wrong way and a right way to handle this. We’ll go through the right way so that you don’t inadvertently break your entire site.
Warning! Make a complete backup of your site first. When things go wrong you’ll need a pristine version of your site to restore. Never edit your site’s files directly on the live server. Do everything on your local machine first and upload them to your web host when you are ready.
Make a Child Theme
A child theme is WordPress’ way of making sure you can safely edit your site’s look. When the main, or parent theme, receives an update any changes you make to that theme are normally overwritten. The child theme method prevents that from happening. Any code you add to your child theme will remain even if the parent gets an update or change.
Add Code to the Child Theme
Once your child theme is made it’s time to add some code to it. Create a file called functions.php, open it up with a text editor, and add the following lines of code to the file:
remove_action( 'woocommerce_before_shop_loop', 'woocommerce_catalog_ordering', 10 );
remove_action( 'woocommerce_after_shop_loop', 'woocommerce_catalog_ordering', 10 );
Save the file when you are done. Those two lines of code will remove the WooCommerce sorting dropdown from before and after all of your templates.
Upload the Child Theme
This can be the tricky part if you aren’t really familiar with how WordPress works. You need to upload the child theme files to your site’s server. The most common way to do this is with an FTP program. Your host should have instructions on how to connect to the server and upload files. If they don’t have anything written you can contact support and ask for help. Another option to consider is hiring a freelancer to assist you with this process.
Activate the Child Theme
You are almost done now. Go to the Appearance section of the WordPress admin. The child theme you uploaded should be on the list of choices now. If it is not you need to go back and confirm you uploaded all of the files correctly.
Once the child theme is activated the sorting dropdowns should disappear from your store. When that isn’t the case there is an issue with the code you added to the functions.php file. Go back and confirm that it was copied correctly. In the doomsday scenario that your entire site is broken, you might need to restore from the backup or contact your host, or a freelancer, for support.