How to Remove WooCommerce Related Products
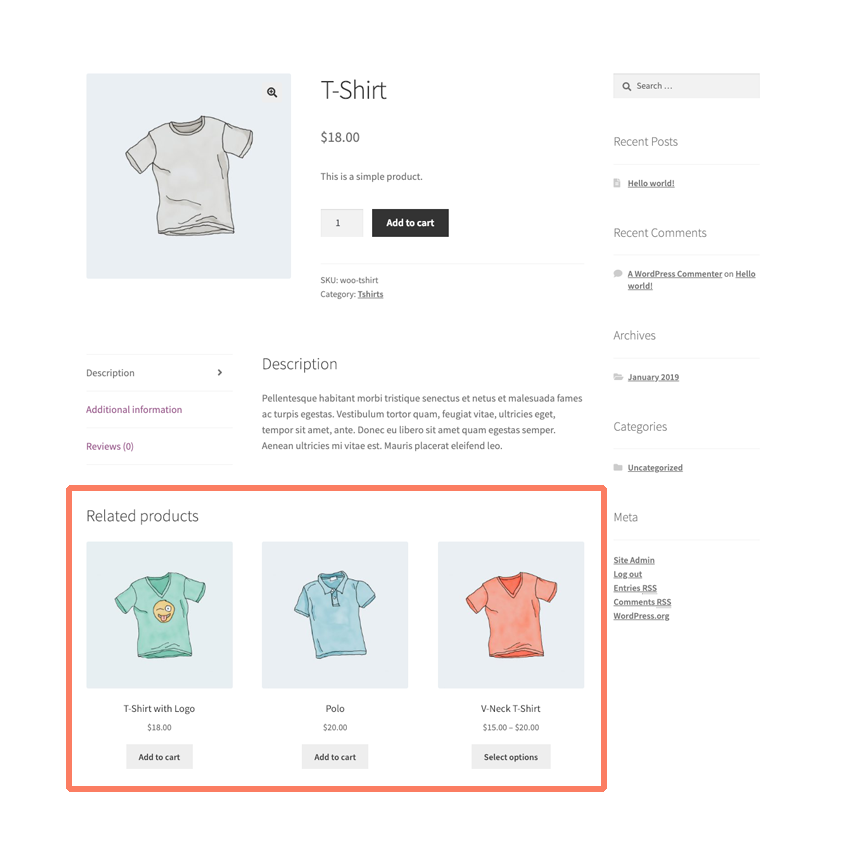
Many WooCommerce themes show customers a list of related products on the individual item pages of your store. Showing related products give shoppers a quick way to continue browsing products and, ultimately, add some more to their cart before checkout.
Related products are a great way to increase sales and grow exposure for your catalog of goods. Unfortunately, if your site doesn’t have a lot of products or the matches WooCommerce considers “related” don’t make a lot of sense it’s usually best to disable this feature entirely.
You can turn off the related products section of your product pages with some file editing and a basic understanding of how to modify a WordPress theme.
How to Hide Related Products in WooCommerce with Code
You can remove related products from a store’s theme yourself if you aren’t afraid to get your hands a little dirty. Here is a quick rundown on how you can safely create a modified version of your WooCommerce store’s theme that does not include related products.
WARNING! First, please backup your current WordPress theme before you start making changes. It’s highly recommended that you do these steps locally on your own machine. Upload the changes to your store’s web server after the fact by using an FTP program.
Create a Child Theme
The safest way to make large changes to a WooCommerce store’s theme is by creating a child theme first. You can learn more about what child themes are on the official WordPress site. The general idea is that a child theme lets you make changes and additions to any existing theme safely. When a child theme isn’t used and the main theme is directly changed there is a risk future updates will overwrite and erase the modifications you made.
Insert Code into the Child Theme
Every WordPress theme should come with a file called functions.php. You’re going to want to make that file in your child theme’s directory if it doesn’t exist. Open it and add the following line of code.
remove_action( 'woocommerce_after_single_product_summary', 'woocommerce_output_related_products', 20 );Upload Your Child Theme
Once that’s done you’ll need to save the file and then upload your entire child theme to your web server. FTP can sometimes be a complicated process. If you aren’t familiar you might need to hire a professional. You can also ask your hosting service’s customer support staff for help.
Activate Your Child Theme
The child theme you created should now be visible inside of the WordPress admin. Next, it’s time to turn it on through activation. Let’s go back to the Appearance option on the main menu. You’ll know you have made a mistake somewhere if your theme isn’t appearing or your site is throwing errors. Do a search for any errors you see and you might be able to narrow down what you did wrong. Programming, even at this basic level, can sometimes be a tricky task. The slightest typo or mistake can bring your whole store offline.
If your theme appears then your upload was successful. Now, simply click the activation button to turn your theme on. Immediately, the theme will be running on your site.
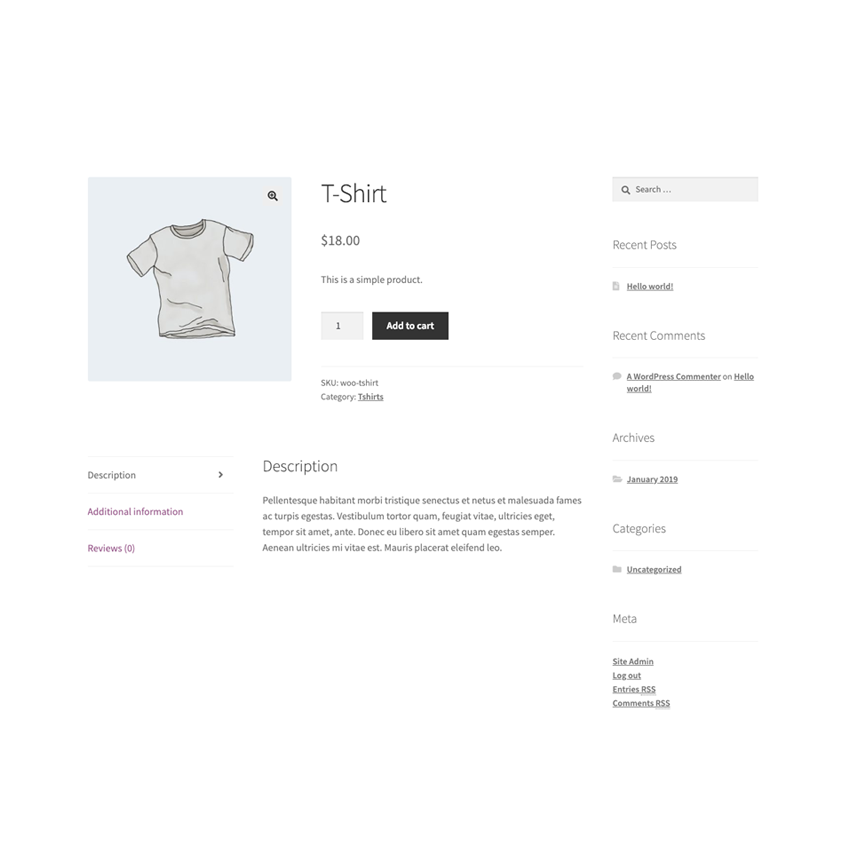
The next time you load up your WooCommerce store the related products section of your site will be gone. That is assuming you have followed all of these steps correctly.
Congratulations! You just became a WordPress developer.