How to Remove the WooCommerce Quantity Field
 Tired of struggling with your product descriptions? ProductWriter.ai can use your existing data and the
power of artificial intelligence to write high-quality product descriptions for you in seconds. Get started for free!
WooCommerce 7.2.0 Changes
This tutorial is no longer compatible with recent updates to WooCommerce. As of WooCommerce 7.2.0, functionality has changed so that quantity fields can only be disabled, and not removed, with our code sample.
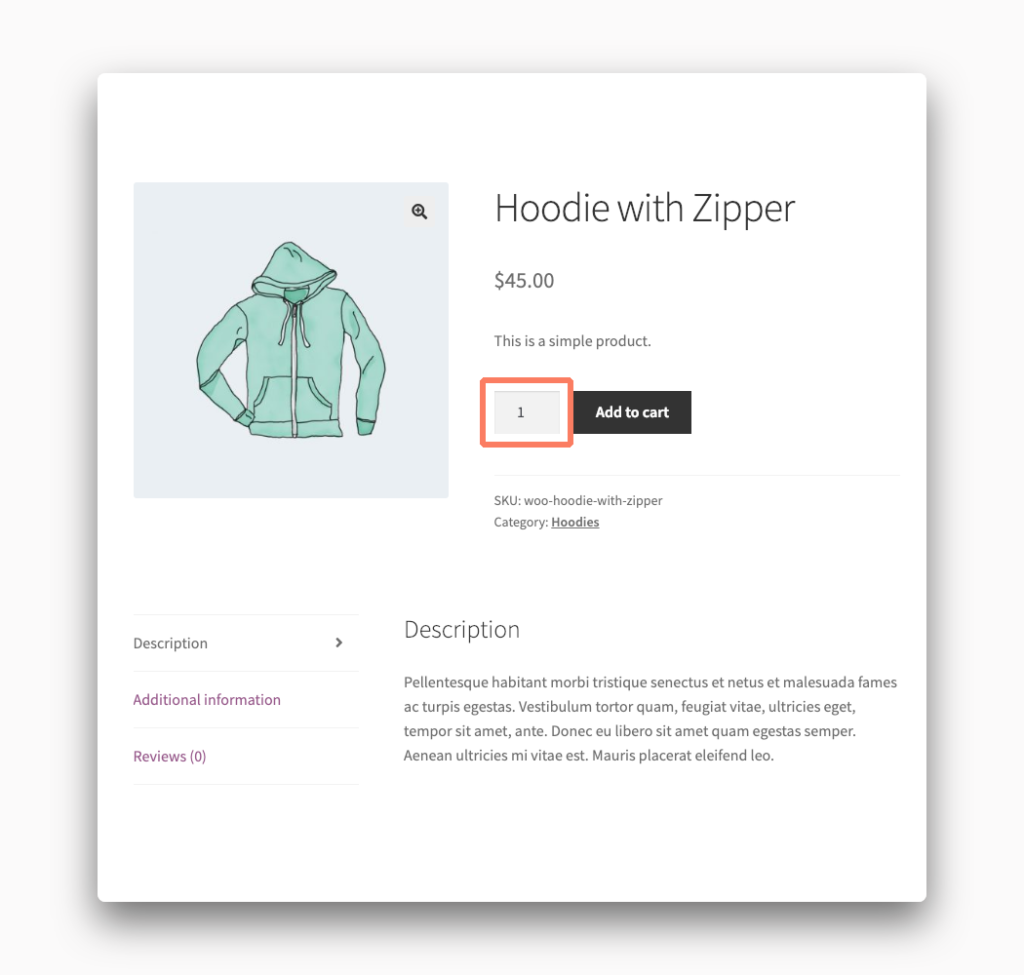
WooCommerce includes a quantity input field on products by default. This input shows up on both the individual product page as well as the cart review screen. This simple feature, especially on the cart view, seems like a wonderful addition to make the user experience better but sometimes it has unintended consequences.
If you never want your customers to be able to order more than one of any given product for sale on your site you are going to want to disable the quantity field from your WooCommerce theme.
There are several ways to do this and they range from tedious to quick and easy. First, We’ll show you how you can manage this by editing products individually inside of WooCommerce. Next, we’ll go through how you can make a universal change and remove every quantity field from your site. This method involves some pretty technical steps and is not for everyone.
How to Hide the Quantity Field on WooCommerce Products
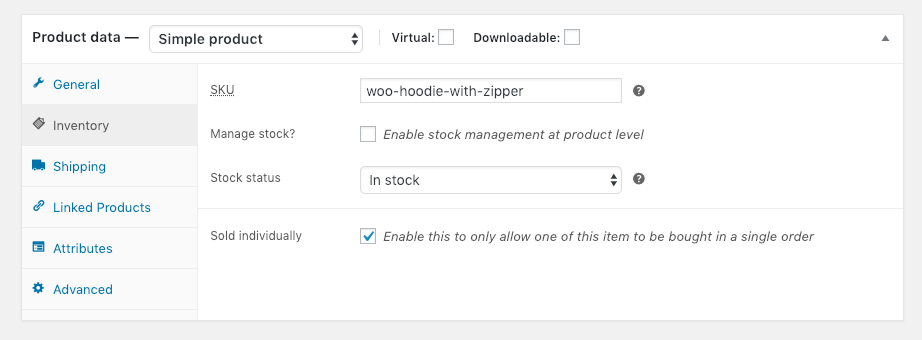
There’s an option inside of WooCommerce’s product management interface to mark an item as only eligible for individual sale. You can find this by opening up your product inside of the WooCommerce admin and scrolling down to the “Product Data” section of the interface.
Under “Product Data” you will see a series of tabs on the left-hand side. The option you are looking for is available under the “Inventory” tab. At the bottom of that tab is a checkbox called “Sold Individually” that will disable the quantity field for this particular product (and only this product).

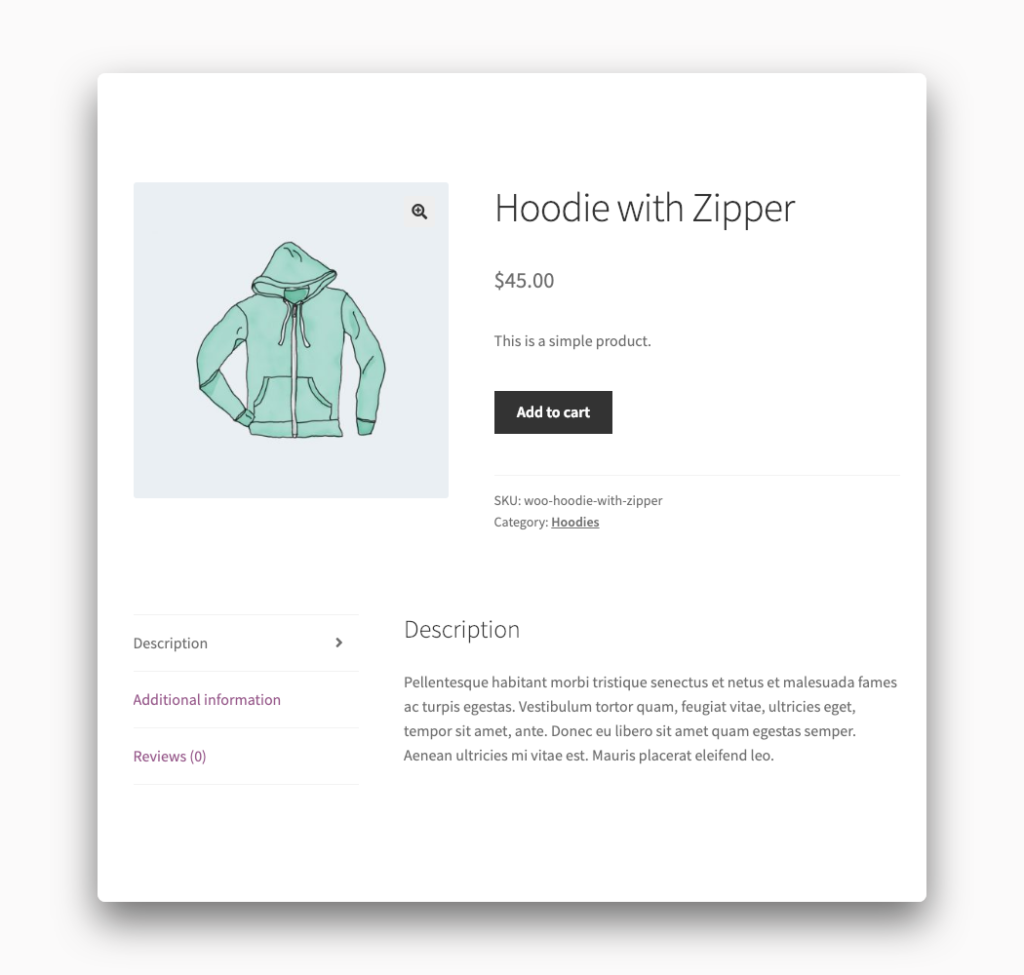
Checking that box and saving your product will remove the quantity field from the product’s page and its row in the cart view when a customer is going to checkout. When a product is marked as “Sold Individually” it also has the added bonus of preventing customers from adding more than one item to your cart by disabling the “Add to Cart” process if one of the items has already been added.
Remove the Quantity Field from All WooCommerce Products with Custom Code
Let’s write some code. You can disable quantity fields throughout your store’s site with a bit of theme editing. First, we’re going to walk through the steps on how you can do this safely. Then we’ll show you the actual code and where to put it.
Alert! Please make a backup of your current WordPress installation before attempting any of the following steps. Make sure you have working backups of your site’s database as well as its theme files. If things go wrong you will need to revert back to those prior versions. You should do regular backups of your store at least weekly. Find a company offering WordPress maintenance packages to handle this for you.
Make a Child Theme
No one should edit a WordPress theme directly. Any changes you make to a theme’s files will be automatically overwritten during future updates. The best way to adjust your WooCommerce store’s look is through a child theme. You can read more about WordPress child themes, and how to create one correctly, using tutorials online.
The basic idea is that the child theme loads up the parent theme, applies your changes, and then displays the site to your visitors. Any updates you download for the parent theme will not change the child theme files. In theory, that means your changes to the site layout will still maintain through the update process.
Add Code to the Child Theme
WordPress themes have a file called functions.php where you can add code snippets. Create that file inside your child theme’s directory and then open it up in a text editor. Add the following lines of code to the file:
add_filter( 'woocommerce_is_sold_individually', 'my_remove_quantity_fields', 10, 2 );
function my_remove_quantity_fields( $return, $product ) {
    return true;
}
This piece of code is both simple and limited at the same time. You will globally disable quantity fields on your site with this snippet. That means every product page and line item in your cart template will no longer have the quantity field shown.
After you’ve added those lines of code save the functions.php file. You’re ready for the next step which is uploading your child theme to your server.
Upload the Child Theme
This is probably the most technical part of the process. Yes, even more so than building a child theme and writing code in a text editor. You need to take your new child theme and upload it to your site’s web host. There are dozens of free FTP programs you can use to do this. Your hosting provider’s technical support staff might be able to help as well.
Active the Child Theme
We are almost finished. When you have successfully uploaded your child theme it should appear under Appearance in the WordPress admin. If you don’t see it there then check the upload again. You might have missed a file or done something incorrectly.
Your quantity fields should be gone from the store as soon as you activate the child theme. If they are still there or, even worse, your site is broken with errors you need to go back and find the problem in your code. This is the point where you might need to find a knowledgeable WordPress developer to help.
WooCommerce 7.2.0 Changes
This tutorial is no longer compatible with recent updates to WooCommerce. As of WooCommerce 7.2.0, functionality has changed so that quantity fields can only be disabled, and not removed, with our code sample.

