How to Remove the WooCommerce Product Image Lightbox
 Tired of struggling with your product descriptions? ProductWriter.ai can use your existing data and the
power of artificial intelligence to write high-quality product descriptions for you in seconds. Get started for free!
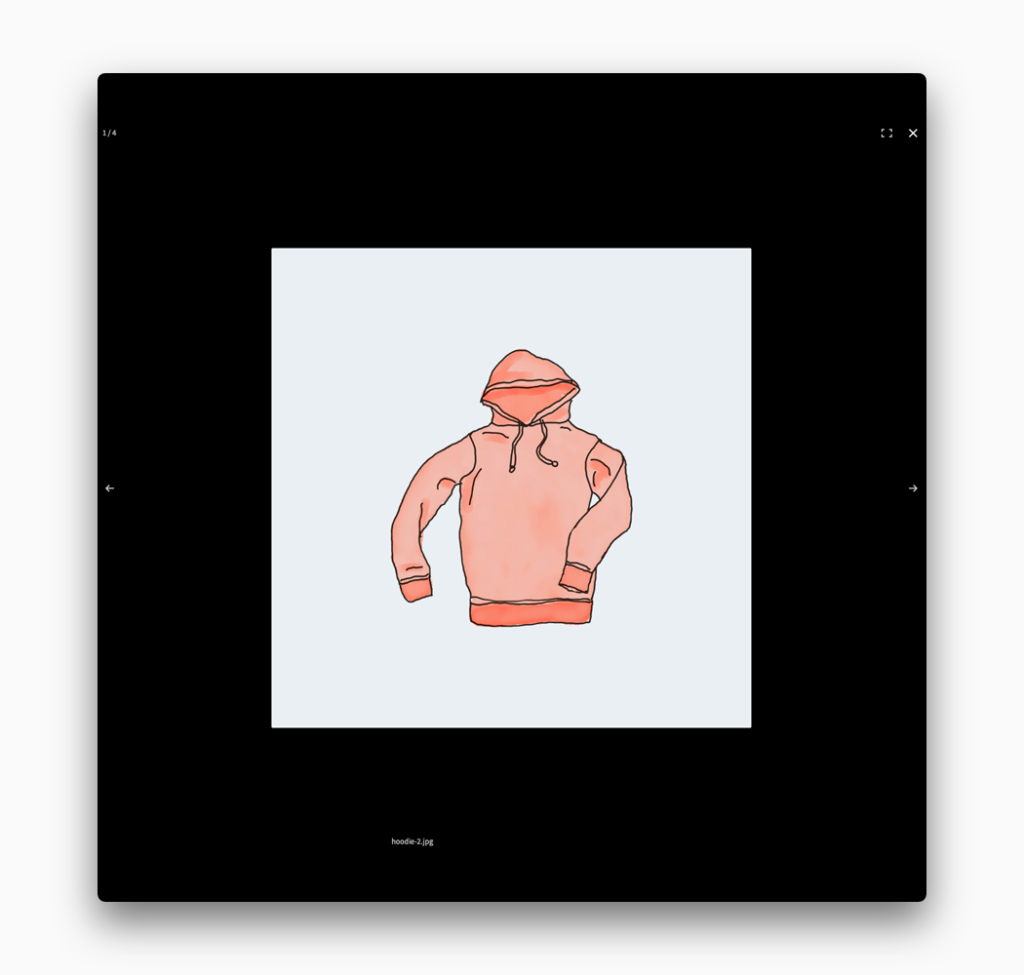
A lightbox, in website terms, is a method of displaying images (and occasionally videos) to a user in a way that draws attention to the image. This is typically done by showing the image in the center of the screen and dimming or darkening the background around it. There is usually navigation added as well to allow the viewer to go back and forth between images in a set without having to exit the lightbox.
WooCommerce comes with this kind of lightbox by default and applies it to all of the images on your product pages. This is great if you have multiple photos or explanatory images you want to be shown with your products. It’s not so great if your products only have one image and the use of a lightbox just adds confusion and unnecessary extra overheard to your storefront.
Anyone interested in disabling the lightbox from their store has two options. You can either make modifications to your WooCommerce theme or purchase our plugin and get this done without having to write any code, change any files or worry about finding a good WordPress developer to do all of that for you.
How to Hide the WooCommerce Product Image Lightbox with Code
We’re going to walk you through what it takes to remove these lightboxes yourself. It involves some very light development so roll up your sleeves and get ready to learn how WordPress themes work.
Warning! Before getting started we highly recommend you make a complete backup of your site. In case you make a mistake, having a safe copy of your WordPress installation to restore is going to be important. Back up all of your site’s files: the database, WordPress plugins, and themes, plus your uploads. Unsure how to do this regularly? Consider finding a company offering WordPress maintenance packages to assist you.
Create Your Own Child Theme
One should never make changes directly to your WordPress theme. When your theme receives its next update any modifications you made will be lost. Luckily, the developers of WordPress have a solution to this problem.
You need to make something called a child theme. A child theme, as the name suggests, uses the files of its parent (your currently active theme). Once your patent theme is loaded the child theme loads its files and code second. This means any child theme code you write will never be lost to an update the parent theme receives.
There are plenty of online tutorials and guides on how to create your own WordPress child theme for you to use as a starting point. Once you have that all taken care of it is time to actually add some code.
Add Code to Your Child Theme
The most common way to include code in a WordPress theme is through a file called functions.php. Create that file inside of your child theme’s folder and then open it up in any text editor. Copy and paste the following lines of code into the file and then save it.
add_action( 'wp', 'my_remove_lightbox', 99 );
function my_remove_lightbox() {
   remove_theme_support( 'wc-product-gallery-lightbox' );
}
There are some things to keep in mind. This chunk of code will disable the product image lightbox from your entire site. That means every product you have on display. You can dictate individual products, or categories, with code but we aren’t going to cover that in this tutorial. Browse the WooCommerce documentation for more information.
Save your functions.php file. With your code in place, it is now time to package your child theme up and get it on your site’s server.
Upload Your Child Theme
The most common way to add a theme to a site is through the WordPress admin itself. Compress your child theme into a .zip file and then head over to the Themes section of the admin. You can find this under the Appearance portion of the menu. From there, add your new theme by uploading it through the interface provided.
Alternatively, if you are feeling ambitious, you can upload your theme directly to the server with FTP. This method is outside of the scope of this tutorial but your hosting provider should have documentation on their website to help.
Zip files? FTP? Is it going over your head a bit? That’s fine. Building child themes and editing files isn’t for everyone. If you’re looking for a faster way to remove the WooCommerce product image lightbox we can help. You should check out our simple plugin for an easier solution.
Activate Your Child Theme
You are ready to go to the final step. Once your child theme has been uploaded head back to the Themes area of the WordPress admin. Your theme should show on the list of choices if everything has gone well. If you don’t see it try and upload the theme again.
When you activate your theme the WooCommerce product image lightbox feature should be disabled from your store. If they still show up, or the entire site is experiencing problems, deactivate your theme immediately. Check your child theme’s code and fix anything that looks incorrect. You’ll have to upload it again afterward to see if your changes solved the problem.
If all has gone well you are finally finished. Of course, this is a lot of back-and-forth for such a seemingly simple task. Thankfully, there’s an easier way.
Disable the WooCommerce Product Image Lightbox the Easy Way
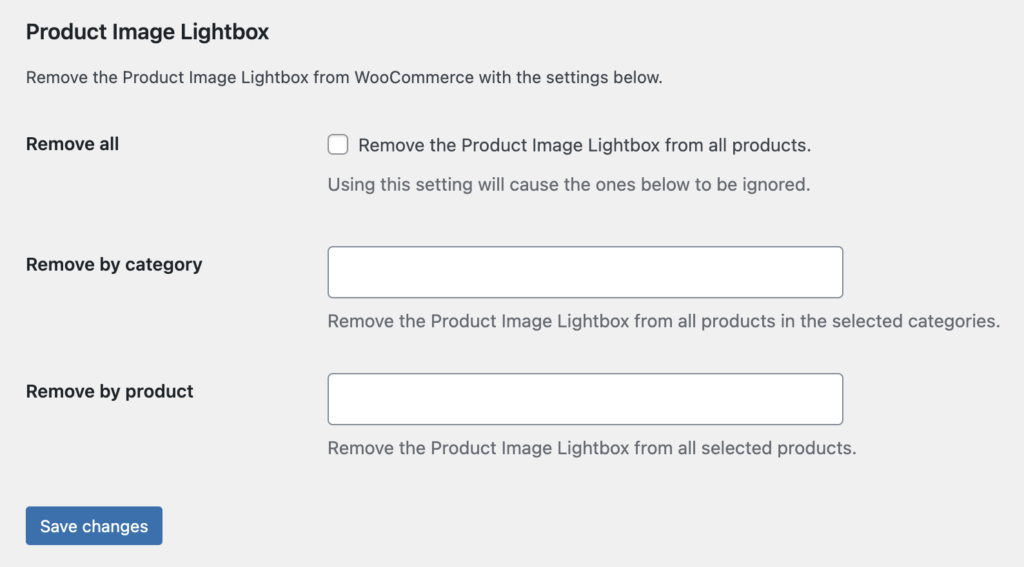
We have created a simple plugin that lets you disable the WooCommerce product image lightbox from your store. In fact, our plugin is much more flexible than the piece of code above.
You can use our plugin to remove the product image lightbox from:
- All Products
- Products in Specific Categories
- Specific Products
Purchasing and installing our plugin takes a few minutes. There is no code to write. You don’t have to make a child theme or do anything complicated. We’ll email you step-by-step instructions to install and activate the plugin.
After installation, you’ll have a new Remove Features tab in your WooCommerce settings screen. From there you can set exactly which products or categories have the lightbox removed.

It’s really just that simple. The plugin gives you more flexibility than our code example and you don’t have to do anything technical.
Your plugin purchase comes with:
- 90 days of support. Get help with your plugin up to three months after purchase.
- No license keys or yearly subscriptions. Pay $14 once.
- Unlimited installations. Install the plugin on as many sites as you want.
We offer a 14-day money-back guarantee. Get a full refund if you are unhappy with our plugin or if it doesn’t meet your expectations.
