How to Remove WooCommerce Product Categories
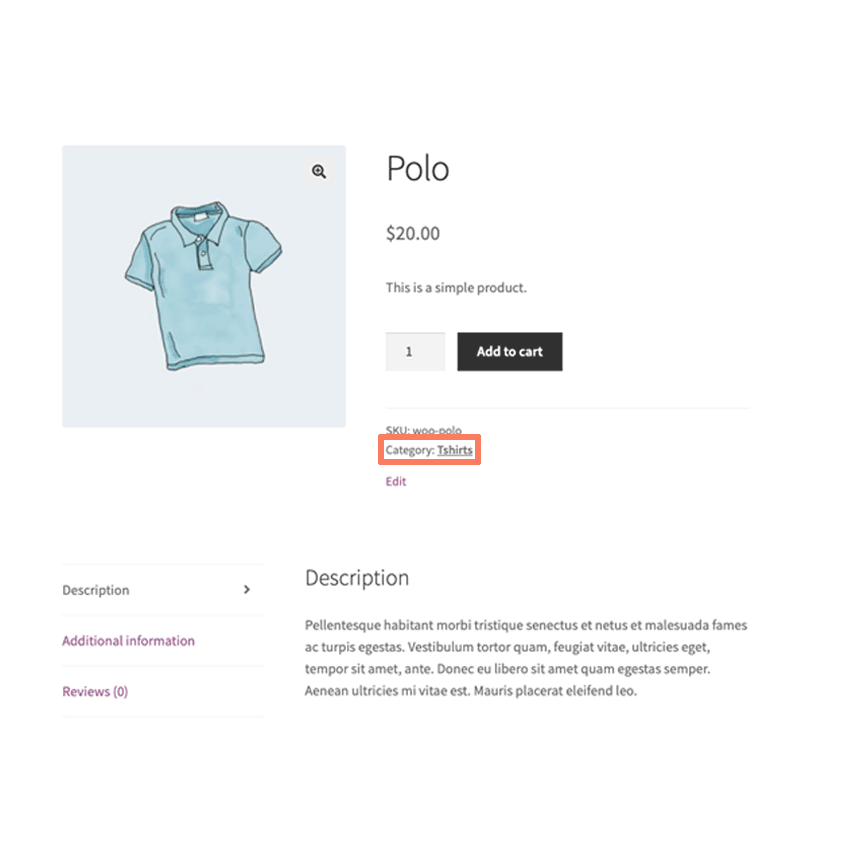
WooCommerce is a very intelligently constructed WordPress plugin that is smart enough to take advantage of core features. One of the main features of WordPress that WooCommerece uses is its taxonomy system. In short, WordPress lets you organize posts and pages with tags and categories. WooCommerce uses that same system to let you organize your products in the same way. Many themes will display tags and categories on each product’s page. Of course, that’s not ideal for everyone and many store owners want a way to remove WooCommerce product categories from their theme.
Unfortunately, there isn’t a default way to remove categories from being displayed on product pages. It’s possible that your theme has some customization features to handle this but the odds are slim based on our experience. Instead, you are going to need to handle this on your own.
Let’s go through how you can remove WooCommerce product categories from your site. This technique is involved but it is safe and secure against future theme updates.
How to Hide WooCommerce Product Categories with Code
Our more technical approach to removing categories involves custom code. In particular, we’re going to add some CSS markup to your site to hide the category. There isn’t a clean way to do this with PHP, the programming language WordPress is built on, so we have to hide it using CSS instead. Fair warning that this process can be complicated but our walkthrough will leave you in the best position moving forward. There are quicker methods out there but they leave you exposed to future updates and problems that our way avoids.
Now, before you start, a word of warning. Things can go wrong if you make a colossal mistake in the following steps. It’s a good idea to make a full and complete backup of your site before moving forward. A complete backup should have all of your WordPress files (plugins, theme, and uploads) plus a full copy of your database. Unsure of how to get started? Maybe consider hiring a firm that offers WordPress maintenance packages to handle this for you.
Ok, let’s get started.
Create a WordPress Child Theme
We’re going to be removing the WooCommerce product categories from your site with a WordPress child theme. Basically, a WordPress child theme is a miniature theme that uses elements from another theme as its base. The other theme, called the parent, is responsible for most of the template and design code. Our child theme just injects its own templates or code in the right places. This is the safest and most secure way to alter a WordPress theme’s layout.
Child themes are safe because they are impossible to be changed by the parent theme. Many sites will tell you to make changes to a theme’s files directly. This is a temporary solution. Any code changes you make to a theme are lost the next time the theme is updated. The update will overwrite the files you modified with newer versions and your code will be lost. A child theme is never impacted by updates run on the parent. This means your child theme will run safely, and correctly, no matter how many times the parent theme sees a new release.
Thankfully, you can find a ton of good tutorials online teaching you how to create a WordPress child theme. Follow along with one of those, or find a child theme generator for your currently installed theme, and then head on to the next step.
Add Code to Your WordPress Child Theme
First, it’s time to add some custom code to your WordPress child theme. Every WordPress theme includes a file called style.css. In general, this is where CSS markup is put to make changes to how your theme looks. We don’t need to get into anything more detailed than that for the sake of this article. Just know the style.css file is where CSS code goes. Open up the style.css in a text editor and add the following line:
.single-product div.product .product_meta .posted_in { display: none !important; }Save your style.css file when you have added the CSS. That single line is all you will need to remove WooCommerce product categories from displaying on your theme’s product template. Now, keep in mind this is a global change. It doesn’t care what product is being displayed. Every product in your store will have the categories hidden using this line of CSS in your child theme.
Upload Your WordPress Child Theme
Next, it’s time to move on and get this child theme running on your site. In order to do that, you will need to upload it to your WordPress installation. There are two ways to do this. The simplest is to take advantage of the theme uploaded in the WordPress admin. Log in to your admin and go to the Themes section of the Appearance menu. This is where you can upload your theme. Just follow the buttons and prompts on the screen. Make sure you have compressed your child theme into a .zip file first. WordPress only knows how to handle themes in that file format.
Alternatively, if you are familiar with FTP that is another option to upload your child theme. Any standard FTP program can be used to connect to your site’s server. From there, upload the child theme directly into the wp-content/themes folder. You don’t have to worry about making a .zip file or anything else. Simply upload the entire folder without compression.
Activate Your WordPress Child Theme
Now, all you need to do is activate your child theme. This is a WordPress term that really just means to “turn on” your theme. Again, let’s head to the Themes section of the WordPress admin. You should see your child theme amongst the list of other themes. If you do not that means your upload wasn’t done correctly. Go back and try that step again until your theme appears on the list.
Activating the theme is simple once it has been properly uploaded. Simply click the button next to your theme to activate it. This is an immediate action. Your child theme will instantly become the theme your WooCommerce site uses. Since this happens right away, your product pages should no longer have the categories displayed.
Do you still see the categories? You probably made a mistake with your CSS. Go back and check the code in your theme’s style.css file to make sure it matches our snippet. Fix any errors and repeat the upload and activation process. Eventually, with trial-and-error, you will get it working the way you want.
Finally, you’ve made it to the end. Congratulations!