How to Remove WooCommerce “My Account” Tabs
WooCommerce comes with an entire account management system out of the box. This is built on the back of the user and account functions that come with WordPress so anyone familiar with that should be right at home here.
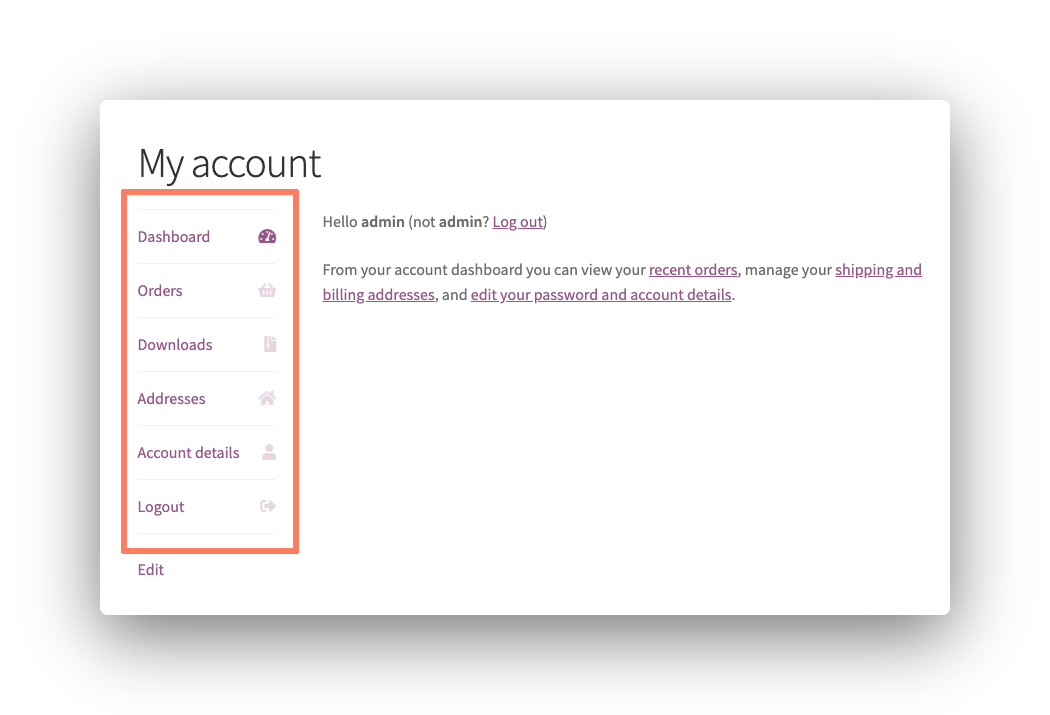
Your store’s theme, or design, will include a separate layout for your customers to manage and access parts of their accounts after they have made a purchase. This layout comes in the form of a tabbed interface with different sections for customer’s to access:
- Dashboard
- Orders
- Downloads
- Addresses
- Payment Methods
- Account Details
- Logout
It will look a little something like this:
Of course, it’s highly likely that you don’t want or need your customers to be able to access all of that information. Some of those tabs, like Downloads for an obvious example, might not even apply to your store at all.
WooCommerce doesn’t have a built-in way to remove those tabs from the account page. In order to get these tabs removed, you’ll need to make some code changes to your store’s theme. In this article, we will walk you through the steps you need to take to handle this yourself.
How to Hide WooCommerce My Account Tabs with Code
You can hide individual Account Tabs if you are willing to get your hands dirty. The code for this is more complex than most WooCommerce changes required. So keep in mind that doing this on your own does come with a certain amount of risk to your site if things go wrong.
Warning! Please make a complete and total backup of your WordPress installation before proceeding with this tutorial. You should be in the habit of doing so already but a backup can save you in case of disaster. If you make a coding error or have difficulties with any part of this process, a backup restore can save you time and money. Consider finding a company offering WordPress maintenance packages to handle regular backups for you each month.
Create a Child Theme
Making changes to a WordPress theme directly is a very bad idea. Any edits or additions you make to a theme’s code will be automatically lost the next time it receives an update. Luckily, the developers of WordPress have a solution in place for this.
It is recommended that you make a child theme if you want to adjust your site’s appearance or behavior. A child theme loads another theme’s code first before loading and executing its own. This means any code you add, or edit, in a child theme will not be lost when its parent theme receives an update.
You can learn more about WordPress child themes and their creation online through one of the many tutorials available. When your child theme is built it’s time to head on to the next step.
Add Code to the Child Theme
Every WordPress theme will execute the code you place in a file called functions.php. If your child theme does not have that file yet you can create it now and copy and paste the following code inside:
add_filter('woocommerce_account_menu_items', 'remove_my_account_tabs', 999);

public function remove_my_account_tabs($items) {
    unset($items['dashboard']);
    unset($items['orders']);
    unset($items['downloads']);
    unset($items['edit-address']);
    unset($items['payment-methods']);
    unset($items['edit-account']);
    unset($items['customer-logout']);

    return $items;
}
There’s a lot to take in there and you might not need all of that code. Certain lines only pertain to certain tabs:
- Dashboard Tab: Line 4
- Orders Tab: Line 5
- Downloads Tab: Line 6
- Addresses Tab: Line 7
- Payment Methods Tab: Line 8
- Account Details Tab: Line 9
- Logout Tab: Line 10
Keep whatever lines correspond to what tabs you want to remove from your site. You can safely delete the rest. One thing to know is that the dashboard tab, by default, contains text that links to other tabs. This can be an issue depending on which specific tabs you are removing.
Once the code is in place you can save the file. Now it’s time to get your child theme up and working on your actual WooCommerce store.
Upload the Child Theme
The first thing you need to do before getting your child theme on your site is to compress it into a .zip file. Once that’s done you can upload it to the site via the WordPress admin. Navigate your way to the Themes section of the Appearance menu. You’ll see a button with “Add New” text. Click that and follow the instructions to upload your theme’s file.
Alternatively, you can upload your child theme straight to the site using FTP. This is a more complex method of upload but some people prefer it. Your web hosting provider likely provides documentation for how to connect to your server via FTP. Consult their support knowledge base if you want to give this method a try.
Activate the Child Theme
If you head back to the Themes area of the WordPress admin your child theme should appear on the list. You’ll have to try the upload again if that’s not the case. When it is there press the “Activate” button and the theme will load automatically.
Assuming everything went smoothly the code you added to the child theme should execute the next time you load up your site. If the changes have had no impact or, even worse, the site is down or showing errors you need to start again. Look at your code, make changes, and upload the theme one more time to see if you have any more success.
Eventually, you’ll get it working.