How to Remove WooCommerce Enhanced Checkout Dropdowns
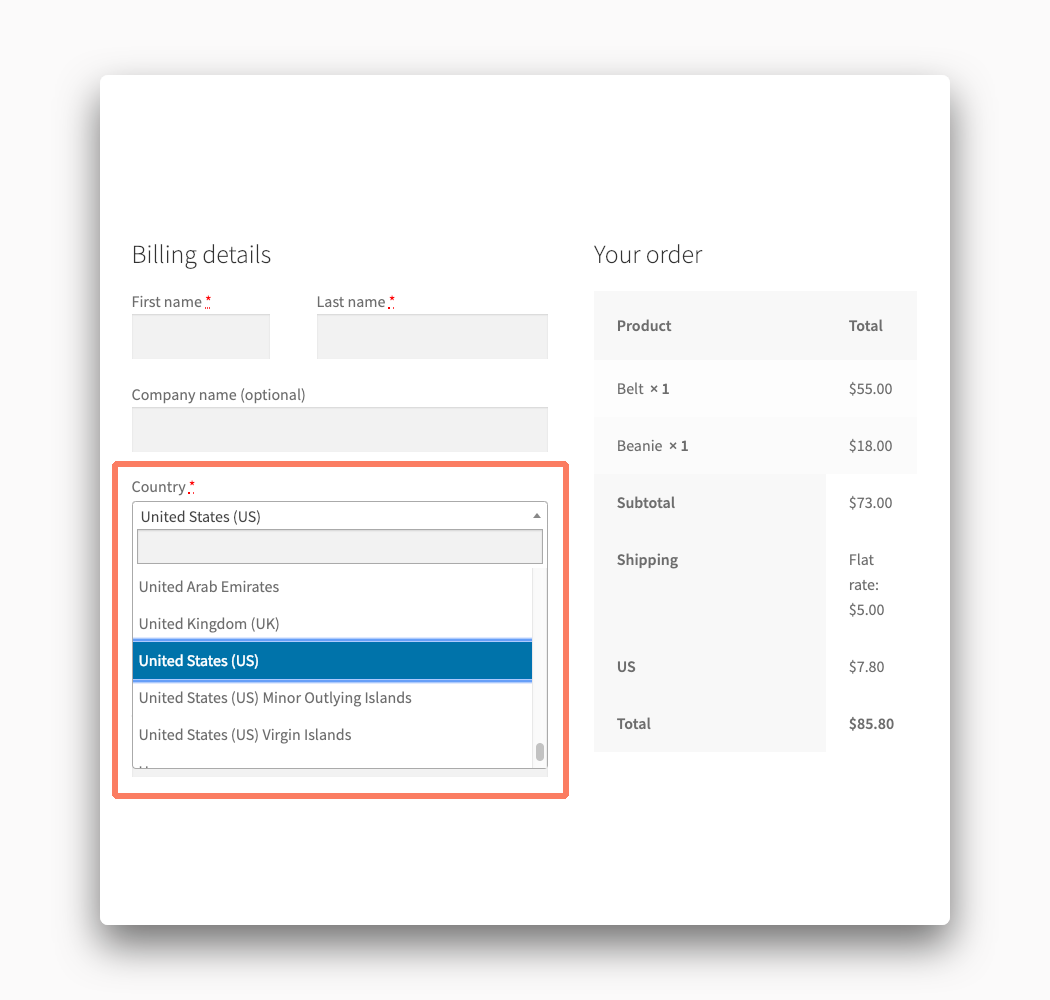
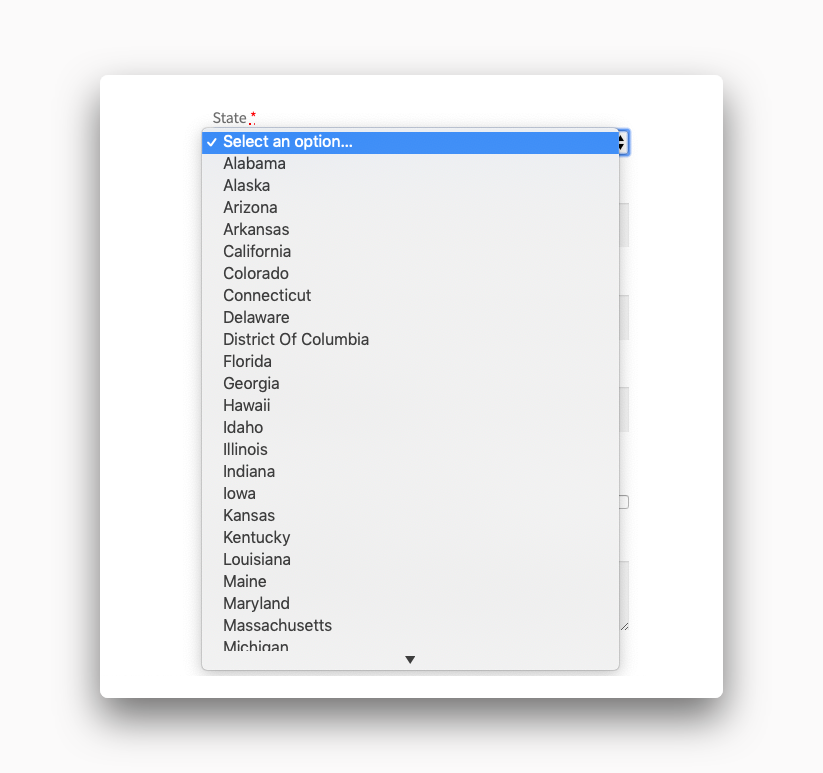
Everyone is familiar with the checkout process of an online store by now. You are asked to provide your billing and shipping information at the time you are submitting your order and typically this involves selecting your country and state/province from a dropdown.
The developers of WooCommerce recognized this is an annoying step in the checkout experience and came up with a solution to make entering your address information quicker.
The checkout screen inside of a WooCommerce store comes with enhanced dropdowns for country and state that let you search with text as well as select from a long list of options.
This is great and perfectly suitable for plenty of online stores. Of course, because we’re dealing with the WordPress ecosystem and the volatility of third-party plugins and themes, there can sometimes be conflicts outside of your control that cause issues with your store. And sometimes the solution to those conflicts is disabling parts of WooCommerce that are getting in the way; things like the fancy country and state dropdowns.
There’s a way to remove enhanced dropdowns from your store with a bit of code. We’ve put together a basic walkthrough if this is your first time working with WordPress theme code.
How to Disable WooCommerce Enhanced Checkout Dropdowns with Code
As we said, you can hide these fancier dropdowns from your checkout screen with some code. Of course, this is something you must do carefully. We’ll go through the safe and proper way to add code to a WooCommerce site now.
Before you start! Make a complete backup of your WordPress installation. We recommend this as your first action in case you make a mistake. You don’t want to have your site experience downtime. With a good backup, you can restore your site to its working state quickly.
Build a Child Theme
The first step is to make a child theme. It’s considered bad practice you add code changes to a theme directly. When you edit a theme’s codebase there’s no guarantee your adjustments will last forever. The next time your theme receives an update it is almost 100% certain your changes will be overwritten. A child theme takes the files from your main, or parent, theme and loads its files second. This way your child theme’s code will always survive a parent theme change.
There are plenty of good tutorials online that will guide you through making a child theme. We recommend this child theme tutorial from Kinsta as a great place to start.
Add Code to the Child Theme
Now it’s time to get your hands a little dirty with some code. It’s pretty standard to include theme code in a file called functions.php. Create that file in your child theme’s main folder and then open it up in a text editor. Add the following lines of code to the file and then save it when you’re finished.
add_action( 'wp_enqueue_scripts', 'my_remove_checkout_dropdown', 100 );
function my_remove_checkout_dropdown() {
    wp_dequeue_style( 'select2' );
    wp_deregister_style( 'select2' );
    wp_dequeue_script( 'select2');
    wp_deregister_script('select2');
}
Upload the Child Theme
When the child theme has its code in place you are ready to upload it to your WordPress installation. The easiest way to do this is through the admin. Compress your child theme into a .zip file first before doing anything else. When that’s ready it’s time to locate the Themes section of the Appearance menu inside the WordPress admin. From here you can easily upload the theme right to your site.
There’s a more technical alternative to this step. You can use an FTP program, with login credentials provided by your web host, to upload the child theme. If you want to go this route consult your hosting provider’s documentation for more help.
Activate the Child Theme
The final step is to turn your child theme on. Go back to Themes in the WordPress admin and you should see your theme as a selectable choice. If the child theme is a no-show you made a mistake with the upload process. Activate it and the enhanced dropdowns should be gone from your checkout right away.
Deactivate the theme if the enhanced dropdowns still show or, even worse, your entire site is down. Check that your code is correct and when you are ready upload the theme and activate it again.
Eventually, you’ll get the results you are looking for.