How to Remove WooCommerce Related Products
 Tired of struggling with your product descriptions? ProductWriter.ai can use your existing data and the
power of artificial intelligence to write high-quality product descriptions for you in seconds. Get started for free!
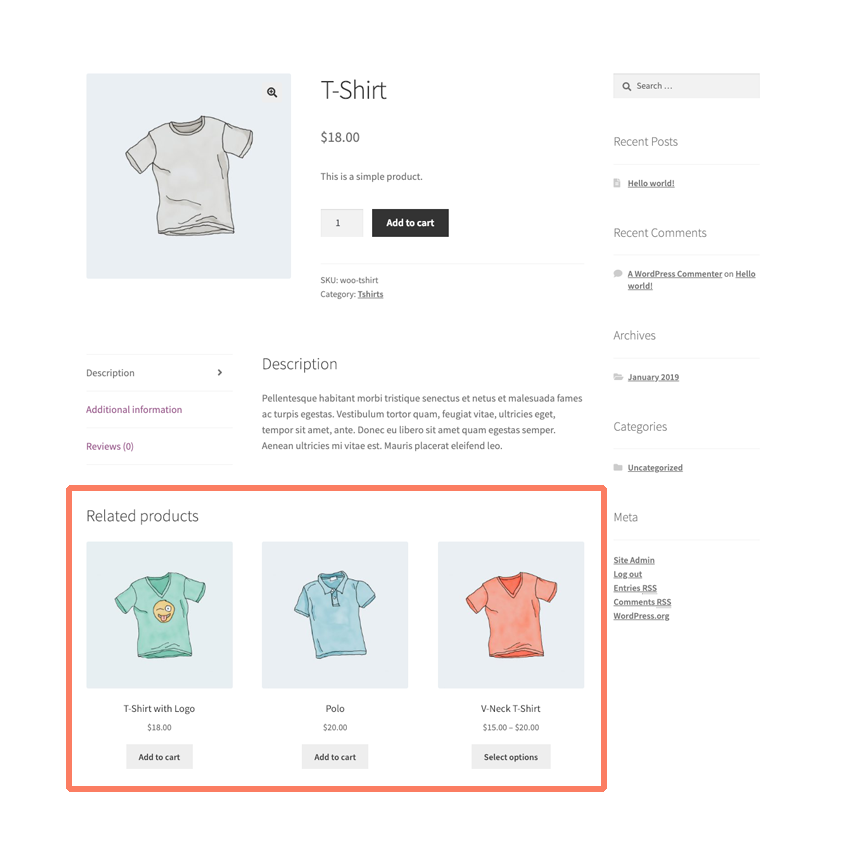
Many WooCommerce themes show customers a list of related products on the individual item pages of your store. Showing related products give shoppers a quick way to continue browsing products and, ultimately, add some more to their cart before checkout.
Related products are a great way to increase sales and grow exposure for your catalog of goods. Unfortunately, if your site doesn’t have a lot of products or the matches WooCommerce considers “related” don’t make a lot of sense it’s usually best to disable this feature entirely.
You can turn off the related products section of your product pages in two different ways. The first requires some file editing and a basic understanding of how to modify a WordPress theme. The second is much easier. You can purchase our plugin and avoid all of this file editing and coding.
How to Hide Related Products in WooCommerce with Code
You can remove related products from a store’s theme yourself if you aren’t afraid to get your hands a little dirty. Here is a quick rundown on how you can safely create a modified version of your WooCommerce store’s theme that does not include related products.
WARNING! First, please backup your current WordPress theme before you start making changes. It’s highly recommended that you do these steps locally on your own machine. Upload the changes to your store’s web server after the fact by using an FTP program.
Create a Child Theme
The safest way to make large changes to a WooCommerce store’s theme is by creating a child theme first. You can learn more about what child themes are on the official WordPress site. The general idea is that a child theme lets you make changes and additions to any existing theme safely. When a child theme isn’t used and the main theme is directly changed there is a risk future updates will overwrite and erase the modifications you made.
Insert Code into the Child Theme
Every WordPress theme should come with a file called functions.php. You’re going to want to make that file in your child theme’s directory if it doesn’t exist. Open it and add the following line of code.
remove_action( 'woocommerce_after_single_product_summary', 'woocommerce_output_related_products', 20 );Upload Your Child Theme
Once that’s done you’ll need to save the file and then upload your entire child theme to your web server. FTP can sometimes be a complicated process. If you aren’t familiar you might need to hire a professional. You can also ask your hosting service’s customer support staff for help.
Too much technical mumbo jumbo for you? Consider handling all of this without writing a single line of code yourself. You can also avoid paying a high-priced WordPress developer to do the work for you. Skip ahead to learn how our plugin can help.
Activate Your Child Theme
The child theme you created should now be visible inside of the WordPress admin. Next, it’s time to turn it on through activation. Let’s go back to the Appearance option on the main menu. You’ll know you have made a mistake somewhere if your theme isn’t appearing or your site is throwing errors. Do a search for any errors you see and you might be able to narrow down what you did wrong. Programming, even at this basic level, can sometimes be a tricky task. The slightest typo or mistake can bring your whole store offline.
If your theme appears then your upload was successful. Now, simply click the activation button to turn your theme on. Immediately, the theme will be running on your site.
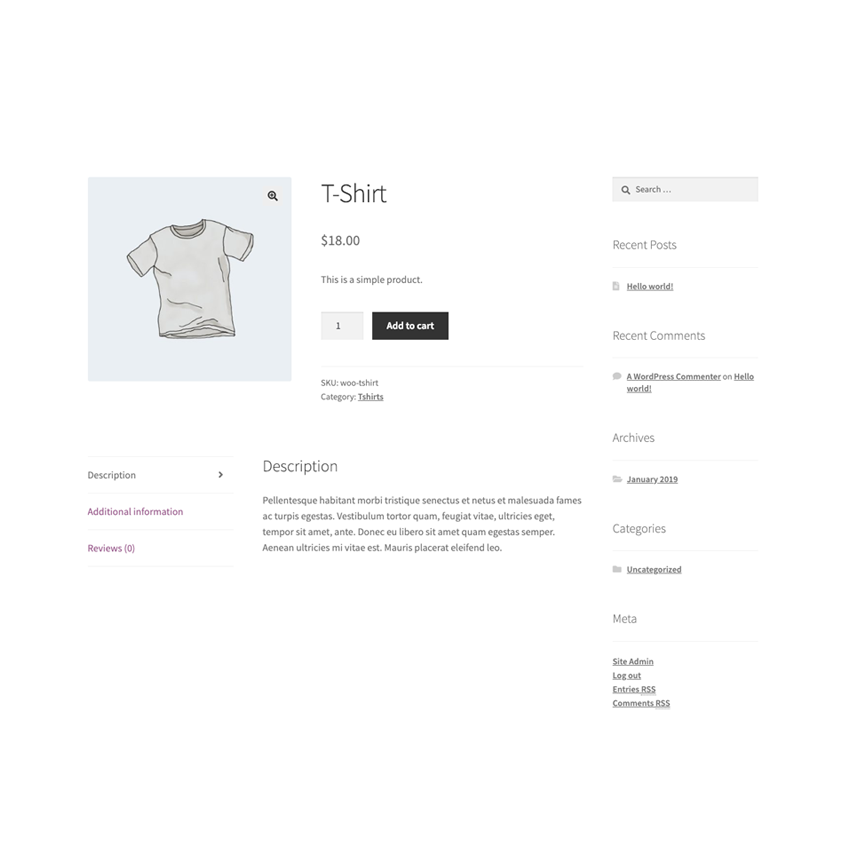
The next time you load up your WooCommerce store the related products section of your site will be gone. That is assuming you have followed all of these steps correctly.
Congratulations! You just became a WordPress developer. Of course, there are many people not interested in all of this technical stuff and the risks involved. There’s an easier way to solve this particular WooCommerce change.
Disable WooCommerce Related Products the Easy Way
We have created an easy-to-use plugin that lets you turn off the related products list from your WooCommerce site. In fact, our plugin is quite a bit more useful than the code snippet we taught you above.
You can use our plugin to remove the related products list from:
- All Products
- Products in Specific Categories
- Specific Products
Purchasing and installing our plugin couldn’t be easier. You won’t be asked to create your own WordPress child theme. There’s no need to open files in a text editor or write code. You aren’t going to have to upload your child theme and test it to make sure you did everything right. All you do is install and activate our plugin. We will send you detailed installation instructions after you complete your purchase. The whole process will take you less than a minute.
After you complete the installation, you will see a new Remove Features tab in the settings of WooCommerce. This is where you get to decide exactly how and where the related products list is removed from your site.
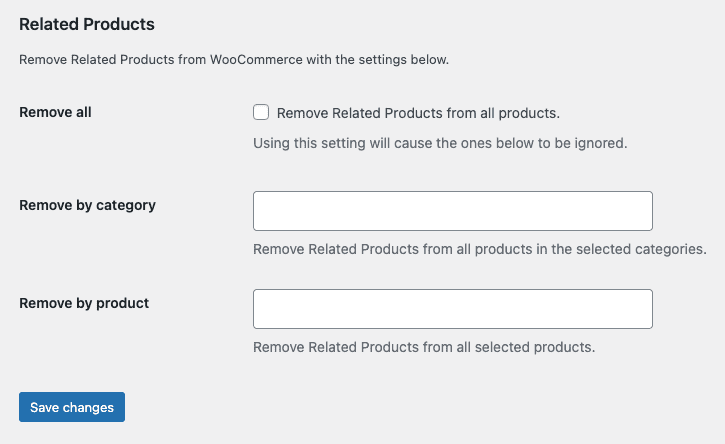
It’s that simple. FInally, all you do is check a box or enter in the names of the products and/or categories you want to no longer have related products. Our plugin does the rest for you. Your decisions go into effect immediately after you save your settings.
Your plugin purchase comes with:
- 90 days of support. Get help with your plugin up to three months after purchase.
- No license keys or yearly subscriptions. Pay $14 once.
- Unlimited installations. Install the plugin on as many sites as you want.
We offer a 14-day money-back guarantee. Get a full refund if you are unhappy with our plugin or if it doesn’t meet your expectations.
