
How to Remove WooCommerce Checkout Fields
WooCommerce 8.0 Changes
As of WooCommerce 8.0, functionality has changed so that the Checkout Block is now the default experience. Sites built before WooCommerce 8.0 will not be impacted, unless by choice. This tutorial works with the checkout shortcode woocommerce_checkout only and not the Checkout Block.
The default list of fields that WooCommerce asks your customers to fill out during the checkout process is pretty large. Almost all store owners can find at least one or two of those fields that are just completely unnecessary for their buyers to provide. Unfortunately, removing WooCommerce checkout fields isn’t a particularly simple task. WooCommerce doesn’t provide a simple way to edit these fields from your store.
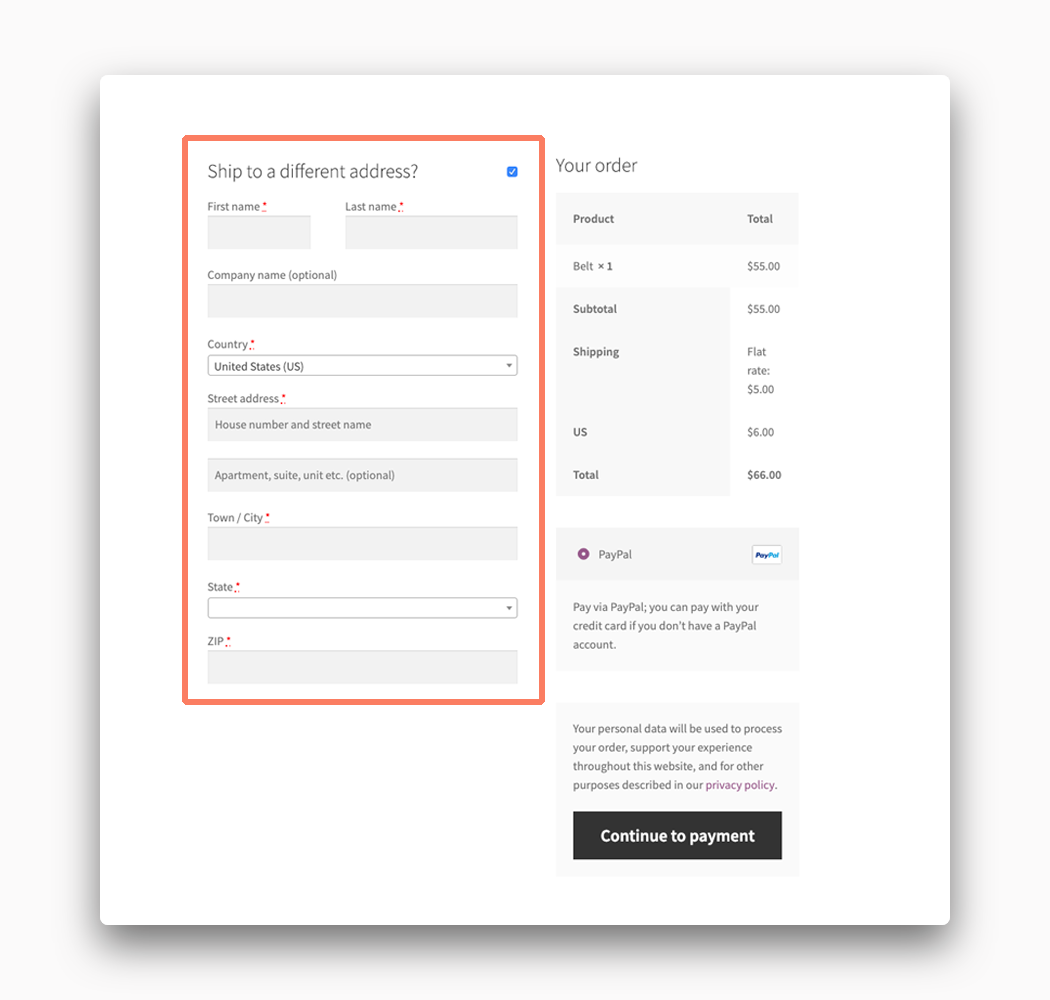
The list of checkout fields shown for billing is very long. The shipping checkout fields are a bit shorter but there are still quite a few. Finally, there are a handful of miscellaneous fields related to these like order notes as well that they tack on at the end of the checkout by default.
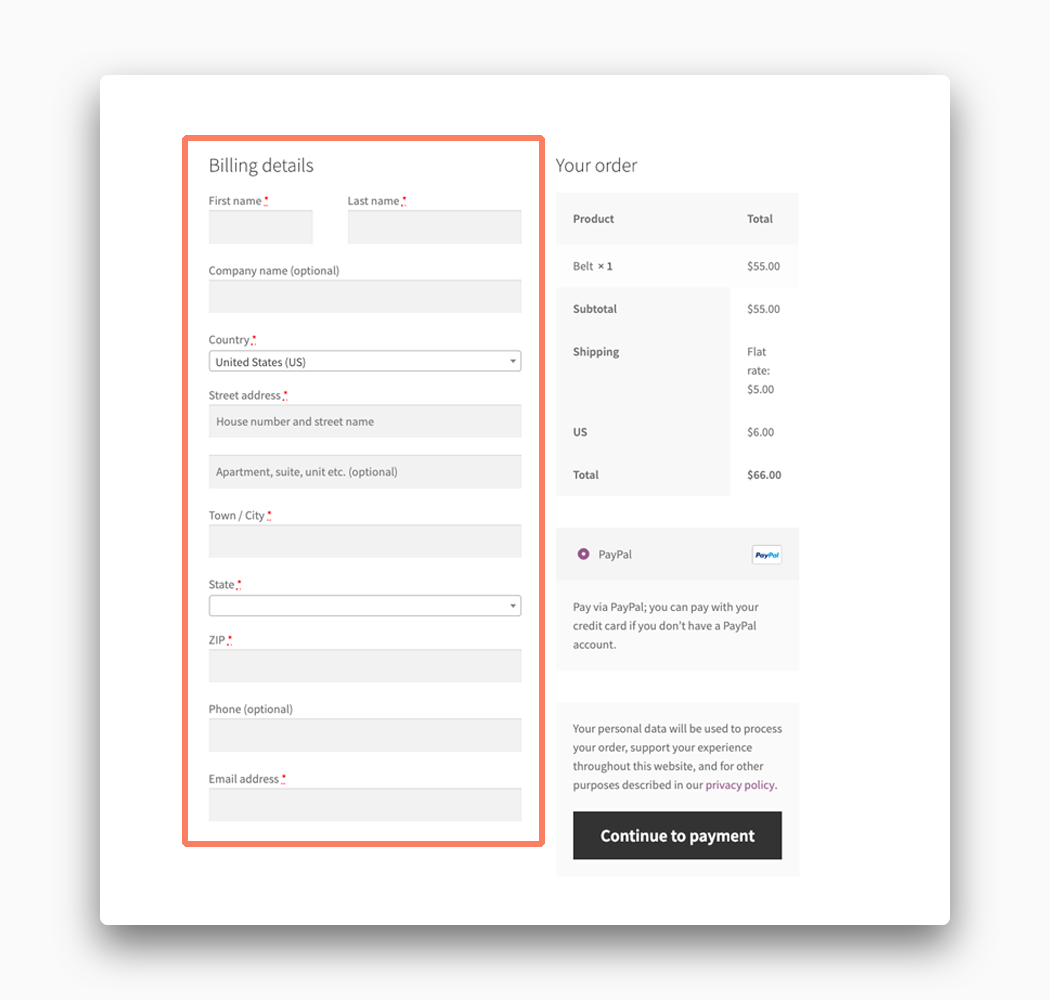
Altogether there are over 20 different possible checkout fields included with WooCommerce. You can remove these if you want to get your hands messy and write some code. We’re going to walk you through how that is done in the rest of this post.
How to Disable WooCommerce Checkout Fields with Code
The code necessary to remove checkout fields is pretty complicated. It’s simple to people used to reading PHP, the language of choice for WordPress, but novices might struggle. We’ll do our best to describe the code line-by-line as we go.
Warning! Before you get started please make a full backup of your WordPress installation. If something goes wrong along the way you’re going to want to be able to revert back to a working version of your store. Non-technical website owners might want to consider hiring this maintenance out to a firm that offers WordPress maintenance packages.
Make a Child Theme
The first step you need to take is creating a child theme. The maintainers of WordPress came up with the child theme system to help people edit their sites safely. A child theme loads another theme (called the parent) first. Then the child theme applies its code afterward.
When you make code changes directly to a theme, instead of a child theme, you run the risk of your work being replaced during a theme update. This system allows the parent theme to receive updates while not overwriting any code in the child theme. There is a great tutorial that will walk you through how to make a child theme.
Insert Code into the Child Theme
Of all the WooCommerce features covered here, this is by far one of the most intense in terms of the code required. If you aren’t familiar with PHP, or low-level programming concepts, you might want to read through this next part a few times.
Every WordPress theme will have a file called functions.php in its main directory. This is the most common place to add code to a theme. Make that file if it doesn’t exist already exist in your child theme. Now, open the functions.php file in a text editor and get ready.
First, add this snippet of code.
add_filter( 'woocommerce_checkout_fields', 'my_remove_checkout_fields', 10 );
function rwf_checkout_fields( $fields ) {
    return $fields;
}
This is going to be the container for the rest of our code which will turn off the checkout fields individually. Each checkout field has its own internal name inside of WooCommerce. To disable any one field we have to include a line in our file that matches the internal name like so:
add_filter( 'woocommerce_checkout_fields', 'my_remove_checkout_fields', 10 );
function rwf_checkout_fields( $fields ) {
    unset( $fields['billing']['billing_first_name'] );

    return $fields;
}
Billing Checkout Fields
In the above code, we are turning off the First Name field under Billing Details. Let’s say, for some crazy reason, we wanted to disable every field under Billing Details. The code would look like this:
add_filter( 'woocommerce_checkout_fields', 'my_remove_checkout_fields', 10 );
function rwf_checkout_fields( $fields ) {
    unset( $fields['billing']['billing_first_name'] );
    unset( $fields['billing']['billing_last_name'] );
    unset( $fields['billing']['billing_company'] );
    unset( $fields['billing']['billing_address_1'] );
    unset( $fields['billing']['billing_address_2'] );
    unset( $fields['billing']['billing_city'] );
    unset( $fields['billing']['billing_state'] );
    unset( $fields['billing']['billing_postcode'] );
    unset( $fields['billing']['billing_country'] );
    unset( $fields['billing']['billing_phone'] );
    unset( $fields['billing']['billing_email'] );

    return $fields;
}
Of course, the idea of disabling all of the billing checkout fields isn’t very practical but if you wanted to just disable a few fields you can use the code above as a starting point. Just remove the lines for the fields you want to keep.
- First Name: Line 3
- Last Name: Line 4
- Company: Line 5
- Address #1: Line 6
- Address #2: Line 7
- City: Line 8
- State: Line 9
- Zipcode/Postcode: Line 10
- Country: Line 11
- Phone: Line 12
- Email: Line 13
Shipping Checkout Fields
The shipping fields have similar, but slightly different names. Here is the code for disabling all of the shipping checkout fields.
add_filter( 'woocommerce_checkout_fields', 'my_remove_checkout_fields', 10 );
function rwf_checkout_fields( $fields ) {
    unset( $fields['shipping']['shipping_first_name'] );
    unset( $fields['shipping']['shipping_last_name'] );
    unset( $fields['shipping']['shipping_company'] );
    unset( $fields['shipping']['shipping_address_1'] );
    unset( $fields['shipping']['shipping_address_2'] );
    unset( $fields['shipping']['shipping_city'] );
    unset( $fields['shipping']['shipping_state'] );
    unset( $fields['shipping']['shipping_postcode'] );
    unset( $fields['shipping']['shipping_country'] );

    return $fields;
}
Again, you probably won’t want to remove all of these but you can pick and choose the ones you want the same as the billing fields.
- First Name: Line 3
- Last Name: Line 4
- Company: Line 5
- Address #1: Line 6
- Address #2: Line 7
- City: Line 8
- State: Line 9
- Zipcode/Postcode: Line 10
- Country: Line 11
Miscellaneous Checkout Fields
The last handful of fields is kind of miscellaneous. The main field is for order notes. The code for that is:
add_filter( 'woocommerce_checkout_fields', 'my_remove_checkout_fields', 10 );
function rwf_checkout_fields( $fields ) {
    unset( $fields['order']['order_comments'] );

    return $fields;
}
There you have it. With the above examples, you should be able to edit your theme’s functions.php file in such a way that you can disable any checkout fields that you wish. Now that we have our child theme and its changes ready it is time to get it online.
Upload the Child Theme
There are two ways to get a child theme uploaded into a WordPress installation. The simplest is to compress the child theme into a .zip file and upload it directly through the WordPress admin. You can find the screens to do that by starting in the Appearance menu of the admin and then visiting the Themes section.
The other option is to upload the files right to your server with FTP. You can find plenty of FTP application options to do this with. Your hosting provider should have instructions on how to log in to your server via FTP as well. Most hosts have extensive documentation and support staff that can help you if you get lost along the way.
Activate the Child Theme
You’re almost done. The final step is to activate the child theme on your site. Once again, you can find this under Themes in the WordPress admin. If your upload was successful you should see your child theme on the list of choices. When the child theme isn’t there you need to go back and try the upload again because something went wrong.
Activating the theme should immediately remove your unwanted checkout fields. If the fields are still there or the site is down you need to deactivate the theme and check your code changes. Eventually, through trial and error, you should get the result you want.