
How To Remove WooCommerce Breadcrumbs
You might not know it by its actual name but you are probably familiar with the tiny text links listed above the categories and products for sale on your WooCommerce store. These links are known as breadcrumbs or a breadcrumb trail and, yes, the name does originate with the famous Hansel and Gretel fairy tale.
Breadcrumbs are meant to show a heirarchy of content on a website and give users a quick means of navigating back and forth along that chain of information. For a WooCommerce site, that typically starts with the store’s front page and then goes from category, to sub-category and finally settles on an individual product.
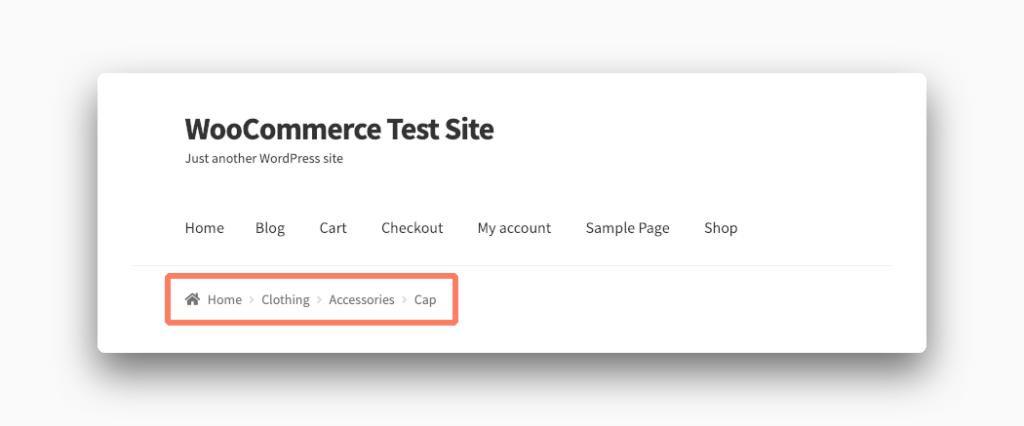
This screenshot shows a typical breadcrumb trail on a WooCommerce store using the popular Storefront theme.
Breadcrumbs are a great way to give users an alternative navigation method when browsing your store but there are reasons you might find yourself wishing these links weren’t being display to your customers.
- Your store doesn’t have a huge amount of categories or products to warrant breadcrumbs.
- The WooCommerce theme your store uses is displaying the breadcrumb trail in an unattractive way that you don’t like the look of.
So how do you remove breadcrumbs from your site?
To do this manually requires editing some files in your theme or creating a child theme if you want to do it properly. Then you have to add some code depending on a few different variables. Let’s go through the procedure.
How to Hide WooCommerce Breadcrumbs with Code
You can remove WooCommerce breadcrumbs from your theme with some code changes. There are a few steps involved and a lot can go wrong if you don’t pay attention. Follow these instructions carefully.
Warning! Please create a full backup of your WordPress site before proceeding. You should do backups on a regular basis but it’s important now when we are going to be messing around with code changes. If there is a problem you can use your backup to restore your site to its previous state.
Make a Child Theme
WordPress has a neat system for safely making changes to themes. When you have a theme you want to tweak you create something called a child theme. You can learn more about child themes, and how to make one, from a great Smashing Magazine tutorial. A child theme, in short, allows you to safely adjust your site’s look or code without worrying about future updates to your real theme replacing your changes in the future.
Add Code to the Child Theme
For simplicity’s sake, know that most code in a theme takes place inside of a file called functions.php. Create a file with that name in your new child theme and then add the following lines of code. Double-check for typos or mistakes and then save the file when you are done.
add_action( 'init', 'my_remove_breadcrumbs' );
function my_remove_breadcrumbs() {
    remove_action( 'woocommerce_before_main_content', 'woocommerce_breadcrumb', 20, 0 );
}
Upload the Child Theme
Now it is time to get your child theme on your WooCommerce site’s server. You can upload themes via the WordPress admin’s Appearance section pretty easily. You will need to compress the child theme into a .zip file first.
Your other option is to upload the whole child theme directory right to the server with FTP. There are plenty of free FTP programs you can use and instructions on how to use them, and to connect to your server, should be available on your hosting provider’s website. If you struggle to figure it out we suggest you reach out to your host’s support channels for help.
Activate the Child Theme
When your child theme is successfully uploaded to the server you should see it under Appearance in the WordPress admin. If it’s not there you make a mistake with the upload process. Assuming everything went ok, just activate the child theme and your breadcrumbs should vanish from the site right away.
In a situation where the WooCommerce breadcrumbs still remain or your site is down then go back through and check your code one more time. Make any changes and then repeat the upload processes again.
Eventually, you’ll get it working. Congratulations! You’ve done more work than the average site owner ever does on their own site.